

Hey there! As a supplier of Kubota D1105 starters, I often get asked about how to test the solenoid of these starters. Today, I'm gonna walk you through the whole process step by step.
First off, let's talk a bit about what a solenoid is and why it's so important in the Kubota D1105 starter. The solenoid is like the brain - switch of the starter. It's responsible for engaging the starter motor with the engine's flywheel and also for sending electrical power to the starter motor. If the solenoid isn't working right, your starter won't be able to do its job, and your engine won't start.
Tools You'll Need
Before we start testing, you gotta gather some tools. You'll need a multimeter, which is super handy for measuring electrical voltage, resistance, and continuity. A pair of pliers can come in handy for disconnecting wires, and a wrench set to remove any bolts holding the solenoid in place. Oh, and don't forget some safety gear like gloves and safety glasses. Safety first, always!
Pre - test Checks
Before you actually start testing the solenoid, there are a few things you should do. First, make sure the battery is fully charged. A weak battery can sometimes mimic the symptoms of a bad solenoid. Check the battery terminals for any corrosion or loose connections. If there's corrosion, clean it off with a wire brush and tighten the connections.
Next, visually inspect the solenoid. Look for any signs of physical damage like cracks, burns, or melted plastic. If you see any of these, it's a pretty good sign that the solenoid is bad and needs to be replaced.
Testing the Solenoid
Now, let's get into the actual testing process. There are a few different tests you can do, and I'll go through each one.
Continuity Test
The first test is the continuity test. This test checks if there's a complete electrical path through the solenoid. To do this, set your multimeter to the continuity setting. It usually looks like a sound wave icon.
Disconnect the wires from the solenoid. You'll have a couple of big wires and a smaller control wire. Use the multimeter probes to touch the two terminals on the solenoid where the big wires were connected. If the multimeter beeps, it means there's continuity, and the solenoid is probably okay in terms of the electrical path for the high - current circuit. If it doesn't beep, there's a break in the circuit, and the solenoid is likely bad.
Voltage Test
The next test is the voltage test. Set your multimeter to the DC voltage setting. You're gonna check the voltage at different points on the solenoid.
First, connect the positive probe of the multimeter to the battery positive terminal and the negative probe to the ground. You should get a reading close to the battery voltage (usually around 12 volts for a standard car battery).
Now, connect the positive probe to the terminal on the solenoid where the positive battery cable is connected. The reading should be the same as the battery voltage. If it's significantly lower, there might be a problem with the connection or a high - resistance issue in the cable.
Next, have someone turn the ignition key to the start position while you keep an eye on the multimeter. Connect the positive probe to the other big terminal on the solenoid. You should see the voltage increase to close to the battery voltage. If not, the solenoid isn't passing the electrical current properly, and it could be bad.
Resistance Test
The resistance test is another important one. Set your multimeter to the resistance setting (usually marked with the Greek letter omega, Ω).
Disconnect all the wires from the solenoid. Use the multimeter probes to measure the resistance between the two terminals on the solenoid. The resistance value should be within the specifications provided by Kubota. If the resistance is too high or too low, it indicates a problem with the solenoid's internal windings.
Troubleshooting
If your tests show that the solenoid is bad, it's time to replace it. But sometimes, the problem might not be the solenoid itself. It could be a faulty ignition switch, a bad wiring harness, or a problem with the starter motor.

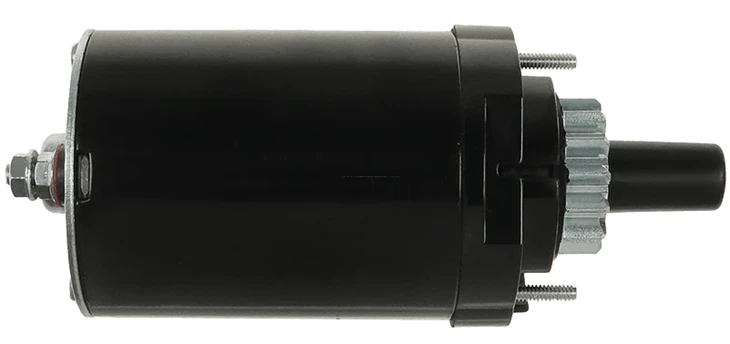
If you're not sure what the problem is after testing the solenoid, you might want to consult a professional mechanic. They have more advanced diagnostic tools and experience to figure out the root cause of the problem.
Other Starter References
By the way, if you're interested in other starter models, here are some reference numbers and applications you might find useful. Check out Reference Number:Denso:1280004290, 1280004291 BOM 410209200, 410212400 Application:Lynx 5900 6900 Ski - Doo MX Z 380, Reference Number:DENSO:1280008280, 1280008620, 1280008621, 2280001600, 2280001601, DSR1013 Toyota:2810017020, 2810017030, 281001703084 WAI :32893N Application:Toyota 1HZ 1HD - FT, and Reference Number:NEW HOLLAND:K0H2009805S KOHLER:2009801,2009805 Application:TORO G4010 G4020 LX420 NEW HOLLAND G4010 G4020.
Conclusion and Call to Action
Testing the solenoid of the Kubota D1105 starter isn't too complicated if you follow these steps. And if you find that you need a new solenoid or a whole new starter, I'm here as your supplier. I can offer you high - quality Kubota D1105 starters and related parts at competitive prices. Whether you're a mechanic looking to stock up on parts or a DIY enthusiast working on your own engine, I've got you covered.
If you're interested in purchasing or have any questions about our products, feel free to reach out. We're always ready to have a chat and discuss your needs.
References
- Kubota D1105 Starter User Manual
- Automotive Electrical System Repair Guides